BECOME A 3D CHARACTER ARTIST
TUESDAYS & THURSDAYS
6:30 PM PT / 9:30 PM ET
ON 3D CHARACTER ART IN GAMES
7 APR 2026 - 16 JUL 2026
DURATION:
14 WEEKS
TUESDAYS & THURSDAYS
6:30 PM PT / 9:30 PM ET
Create game-ready characters with industry-level expertise, from concept to final cinematic render.
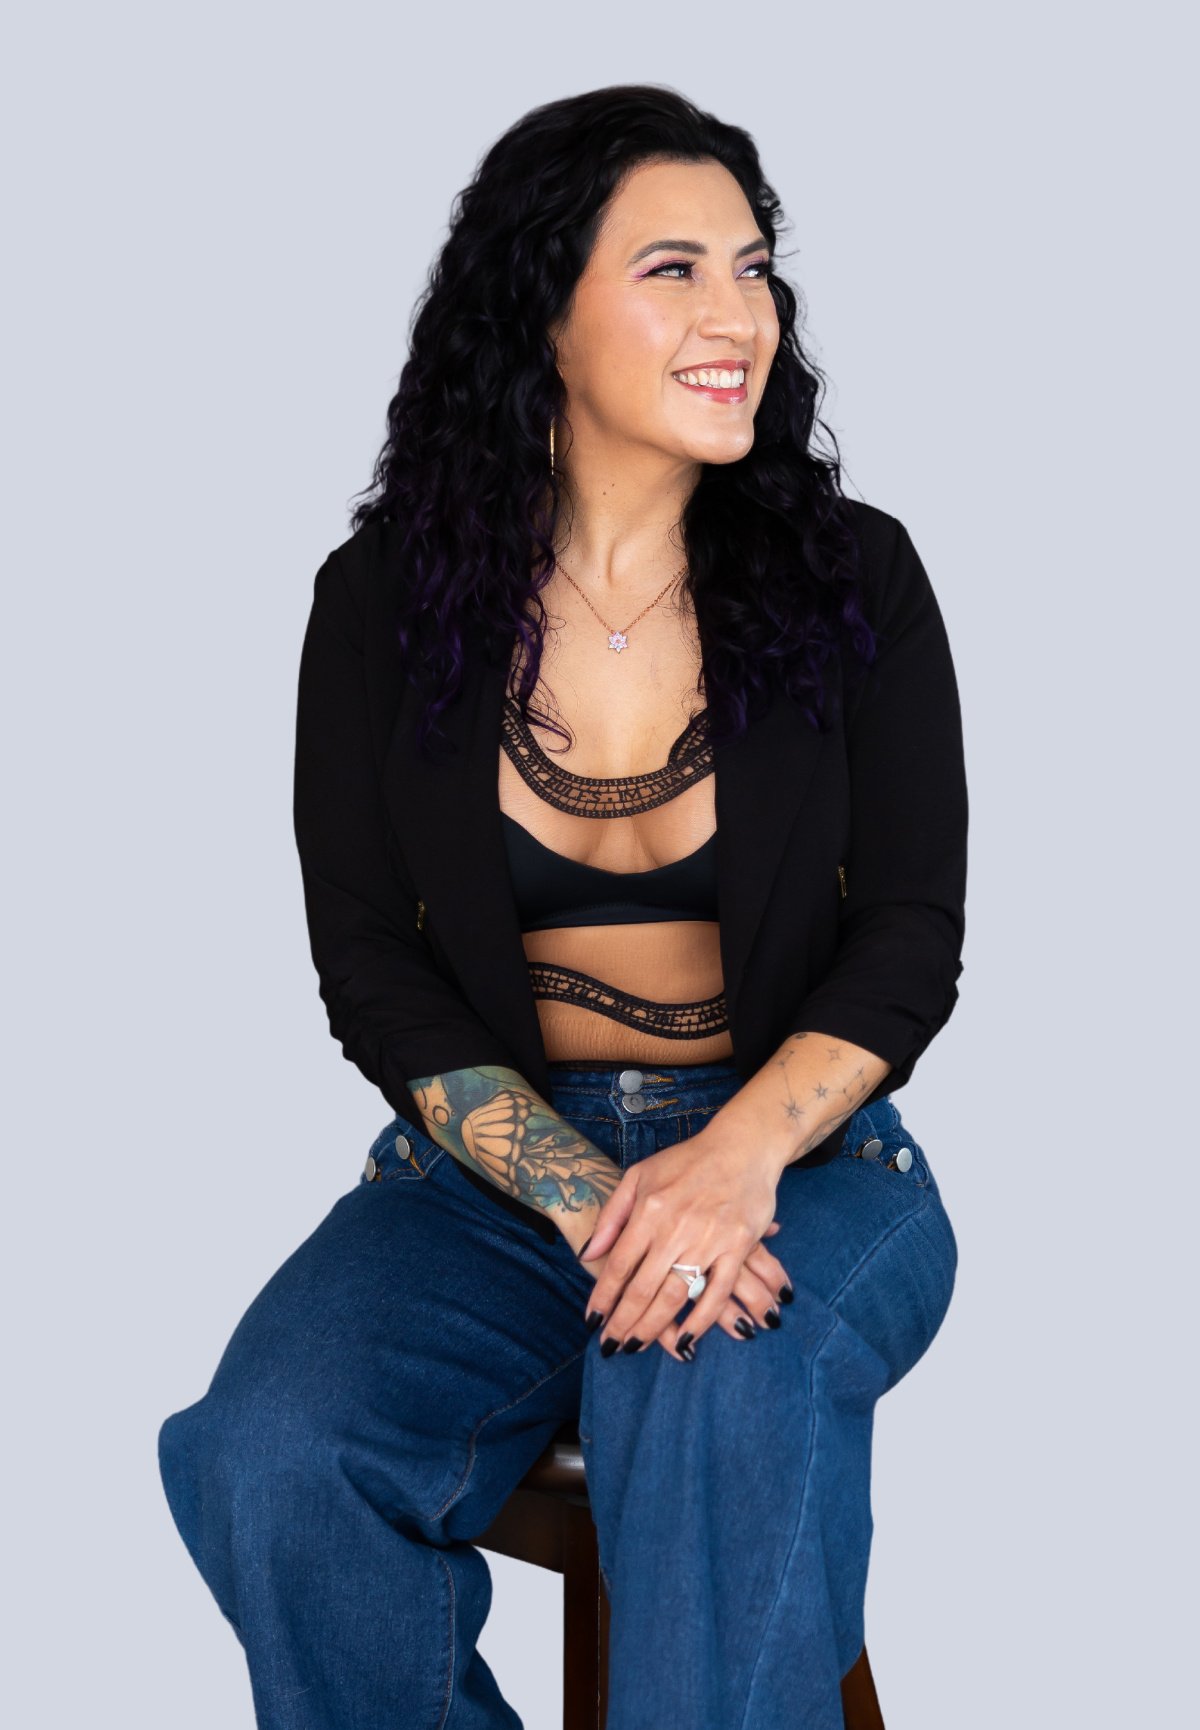
Priscilla Landerer, former Senior Character Artist at Activision Blizzard and a creative force behind Call of Duty and Destiny, will guide you through the complete 3D character design pipeline.
THIS COURSE IS FOR YOU, IF...
-
YOU ARE A GAME ARTIST OR A GAME DEVELOPER
Level up your game by growing your skillset. Whether you're an AAA artist, an indie developer, or a freelancer juggling tight deadlines, we’ll give you 3D art fundamentals, efficient, time-saving techniques, and actionable insights to enhance your knowledge and truly master professional 3D character art.
-
YOU ARE PASSIONATE ABOUT 3D GAME ART
Turn your hobby into fully-realized, portfolio-ready 3D cases. Stop just sketching characters for fun or tinkering with 3D tools — we’ll give you structure. You’ll learn to sculpt lifelike anatomy, understand design principles, and use industry-standard software to bring your dream characters to life. It’s time to create with confidence.
-
YOU ARE A NEWBIE CHARACTER ARTIST ASPIRING TO GROW
This course is also a great fit for artists who want to know more. Stay sharp in the ever-changing market by getting hold of advanced workflows and insider tips from an experienced industry expert. Build characters that meet demands of modern games and outshine the competition.
Our students work in 1600+ companies worldwide
14 weeks might seem like a lot, but it’ll fly by and leave you with skills that stick. You’ll sculpt with anatomic accuracy, optimize models for real-time gaming, create high-quality textures, and more — mastering every step of the process.
You’ll learn how to ace interviews, grow your network, gain the know-how to land gigs and navigate the business side of freelancing, ensuring you're not just creating great art but building a thriving career.
Bring your character to life with cinematic-quality renders and a turntable animation. From lighting and composition to post-processing effects, you’ll craft a showcase-ready piece that highlights your design and technical skills in a professional way.
PRISCILLA LANDERER
LinkedIn Profile- Senior Character Artist, ex-Activision Blizzard
- Delivered AAA titles with 10+ years of gaming industry expertise
- Contributed to iconic franchises like Call of Duty and Destiny
- Worked on Call of Duty: Advanced Warfare, Black Ops 4, Warzone, and Vanguard
- Shaped Destiny 2 and its expansions, including Forsaken and The Taken King
- Intro to instructor
- Course structure
- Overview of the 3D Character Art Pipeline
- Assignment structure & due dates
- Housekeeping
Discover how to develop unique and visually appealing character concepts by mastering the fundamentals of silhouette, shape language, and proportions. Additionally, explore how to tap into a variety of resources, including AI tools, for design inspiration.
- Creating Unique, Interesting, & Appealing Characters
- The Importance of Silhouette, Shape Language, and Proportions
- Resources & How to Find Inspiration
- Creating an Image Board
- How to Present a Character Design Effectively + Examples
Assignment #1: Character Image Board
Gather inspiration and reference images to create an organised image board for an original character design.
Creating a believable character involves more than meets the eye. Delve into human anatomy and learn how to nail proportions, bone structure, major muscle groups, and principles of balance and weight distribution. You will also discover how to present your designs to clearly communicate your ideas.
- Proportions, Bone Structure, & Major Muscle Groups
- Balance, Areas of Rest, & Areas of Interest
- Applying the Foundations of Anatomy to Create Believable Characters
Assignment #2: Character Turnaround
Create a 2D concept of an original character as a turnaround sheet.
In this class, you will gain an understanding of the Zbrush interface and its key tools, as well as navigate the workspace, manipulate objects, and create basic 3D models using ZBrush's intuitive sculpting tools.
- Project Set-Up & Ease-Of-Use Settings
- Interface & Navigation
- Manipulating Objects
- Workshop: Pitch your character designs (Image boards) for approval
Dive deeper into Zbrush as you explore different sculpting techniques and brushes, as well as create detailed 3D models. You will also get to refine your sculpting skills through hands-on practice and constructive peer feedback.
- Getting started with Zbrush
- Blocking out Basic Forms
- Demo: Brushes & Sculpting Techniques
Assignment #2: Character Blockout
Apply techniques to block out an original character in ZBrush.
In this class, you will gain a solid understanding of the fundamental techniques in ZBrush and be able to apply them effectively to your own 3D models. You will also gain confidence in navigating the ZBrush interface and using its sculpting tools.
- Applying Learned Tools and Techniques
- Getting Comfortable With ZBrush
- Giving Feedback & Answering Questions on In-Progress Blockouts
Start with the body — learn to accurately sculpt character bodies, considering primary and secondary forms, proportions, and anatomical landmarks. Further, explore how real-world anatomy can be applied as a foundation for creating believable fantasy and sci-fi characters.
- Defining Primary Shapes & Overall Character Form
- Recap of Bone Structures & Major Muscle Groups
- Proportions, Anatomical Landmarks, & Dynamic Forms for Torso & Limbs
- Real Life Anatomy as a Foundation for Fantasy & Sci-Fi
- Demo: Create a Character Body
Assignment #3: Sculpting the Body & Anatomy
Define the body, muscle structure, & joint placement of original characters.
Onto human and non-human faces. Dive into facial muscle structure, expression, facial proportions, and creating unique character identities. You will also learn how to use ZRemesher and Polygroups to optimize your models for further detailing
- Face Proportions & Character
- Blocking Out Facial Muscles & Landmarks
- Zremesher & Polygroups for Edgeflow
- Demo: Blocking Out/Sculpting a Face (Human & Non-Human)
Assignment #4: Sculpting the Head/Face
Refine blockouts for an original character by adding facial features and focusing on proportions.
This is your chance to address any roadblocks you may have and get some valuable feedback.
- Focus on having a strong, clean base for your character
- Ask questions and receive feedback on current progress
In this class, you will delve into realistic and stylized clothing and learn to block out outfits, sculpt fabrics, and add intricate details to your character’s attire.
- Best Practices for Blocking Out clothing and accessories
- Overview of garment construction and silhouette support
- Quick overview of Marvelous Designer
- Demo: Sculpting Techniques for Creating Clothing and Armor
Assignment #5: Dressing your Character
Develop your character’s outfit and accessories using the sculpting techniques demonstrated in class. Hair creation is optional. Students who choose not to create hair may instead focus on strengthening their clothing, accessories, and overall sculpt polish.
Every character deserves a good hair day. Delve into industry-standard techniques to create realistic and stylized hair for your characters. You will also learn to achieve different hairstyles and textures using tools and brushes in ZBrush.
- Industry-Standard Methods for Hair & Fur
- Stylized hair workflows and common production methods
- Demo: Blocking Out Hair Using Different Tools and Brushes
Looking good — now to refine your 3D character models. Discover how to add secondary and tertiary details to create a visually appealing and polished final product.
- Polishing & Adding High Resolution Detail
- Using layers for a non-destructive workflow
- Separating Different Materials
- Demo: Tools & Techniques for detailing and cleaning up your sculpt
Assignment #6: Finished High Poly Character
Finalise a high poly character sculpture by cleaning up meshes, combining subtools, and adding final details.
All that’s left is the finishing touches — learn how to add high-resolution details to your 3D character models, as well as separate different materials, optimize your models for rendering, and end up with a visually stunning final product.
- Demo: Clean Up & Polishing Process
- Getting the character ready for export and retopology
- At this stage, the High Poly Sculpt should be presentation ready
- Ask questions and receive feedback on finished Sculpts
Onto the next — retopology. Develop a grasp of the fundamentals and learn how to create clean and efficient retopology using ZBrush. You will also learn how to apply techniques for smooth deformation and rigging to your models.
- Purpose & Importance of Retopology in 3D Character Art
- Topology Fundamentals
- Movement & Deformation in 3D Space
- Retopology Options with ZBrush
- Demo: Retopology Workflow in ZBrush
In this class, you will cover the retopology workflow in Maya. Discover how to create clean and efficient character geometry for optimal performance in animation and rendering. You will also gain some valuable tips and tricks to streamline your retopology process.
- Maya Overview & Workflow
- Demo: Maya’s Modeling Toolkit & Creating Character Geometry
Assignment #7: Clean, Organized, Low-Poly Character Version
Using the tools and techniques learned in class, retopologize the character to create a clean, organized, animation-ready low-poly model suitable for game production.
Delve into organic shapes, such as the human body, and how to retopologize them. Learn how to maintain the underlying form and details of your sculpted models while creating a clean and efficient retopology for animation and rendering.
- Separating the character into individual parts
- Outliner organization and maintaining a clean workspace
- Demo: Topology organization, workflow clean up & best practices
Class 16 will sharpen your skills in retopologizing complex shapes. You will learn how to maintain sharp edges, create clean retopology for mechanical elements, and apply this to your own designs.
- Identifying and resolving common problem areas in character topology
- Strategies for organic, layered, and complex forms
- Demo: Resurfacing Complex Shapes and addressing topology challenges
The final review of your game-read topology! This is a great opportunity to get some feedback on your work and troubleshoot some of those common problem areas.
- Final review and validation of game-ready topology
- Workshop: Troubleshooting problem areas, addressing deformation concerns, and preparing the character for UV unwrapping and baking
What is UV wrapping and why is it important? Explore the fundamentals — laying UVs, calculating map numbers, and using Maya’s UV toolkit to create clean UV maps.
- UV Maps & Their Necessity
- Laying out UVs & Calculating Map Numbers
- Demo: Maya’s UV Toolkit & UV Editor
Assignment #8: UV Mapping Your Character
Apply techniques learned in class to unwrap original characters, creating efficient UV layouts, and preparing models for texture application and baking.
Delve further into the UV unwrapping process. Gain hands-on experience in unwrapping complex character models, including intricate details and multiple materials.
- Demo: Unwrapping Process & Final Model Clean-Up
Explore baking texture maps and its importance in creating realistic and detailed 3D characters. Learn how to prepare your high-poly and low-poly models for baking, set up a baking scene in Substance Painter, and choose the appropriate types of maps to capture the desired details.
- Transferring High-Res Details from High-Poly Sculpts to Low-Poly Models
- Types of Maps
- Preparing Models for Baking
- Demo: Preparing Models & Setting Up a Bake Scene in Substance Painter
Assignment #9: Texture Baking
Prepare original characters for texture baking.
Class 20 will prepare you to successfully bake texture maps for your 3D character models in Substance Painter. Explore the baking process, troubleshoot common issues, and create high-quality texture maps that capture the details of your models.
- Texture Baking: Next Steps
- Demo: Baking Process Within Substance Painter
- Workshop: Completing Texture Bakes in Groups
Dive into texture maps, their purpose, and the different types. Explore various texturing workflows, get practical in Substance Painter to create basic textures, and learn how to import and set up your baked texture maps.
- Introduction to Texture Maps, Their Purpose, and Types
- Overview of Different Texturing Workflows
- Demo: Introduction to Texturing With Substance Painter
Assignment #10: Texturing Your Character
Use the tools and techniques learned in class to texture a character model. Finalise character textures and ensure they are optimized for different render engines as well as real-time rendering.
Discover how to create hand-painted textures for stylized characters. Explore various brush strokes, layering techniques, color palettes, and principles of color harmony and stylization. Finally, put this knowledge to the test in Substance Painter.
- Hand-Painted Textures for Stylized Characters
- Color Palettes, Brush Strokes, Layering Techniques
- Stylization & Colour Harmony Tips & Techniques
In this class, you will learn PBR theory and its underlying principles, the relationship between different texture maps, and how to use PBR charts and online resources to create accurate materials. You will further learn how to use Substance Painter’s PBR validation material to assess the quality of your PBR textures.
- PBR & Its Role in Creating Realistic Textures
- PBR Theory & “Rules”
- Relationship Between Texture Maps
- PBR Charts & Online Resources
- Substance Painter PBR Validation Material
Learn how to prepare your textures for final use in a 3D engine. Explore the different texture formats, texture packing techniques, and how to export texture files. You will also learn how to set up a scene in a different 3D engine, apply your textures, and check the overall appearance of your character.
- Texture Formats
- Texture Packing
- Exporting Texture Files
- Demo: Verifying textures and preparing assets for rendering in Marmoset.
Assignment #11: Final Portfolio Beauty Render
Showcase a finished character in a professional-quality beauty render.
Pose for the camera! This class will focus on posing the character in both T-pose and dynamic poses. This is where the character really starts to pop!
- Presenting a character in a dynamic pose vs a T-Pose
- The Character Artist Portfolio + EXAMPLES
- Demo: Using Zbrush Transpose Master for posing
- Demo: Exploring Rigging & Posing options with Mixamo
Discover the difference between cinematic beauty renders and real-time renders in video games, and learn how beauty renders are used in advertising and marketing. You will also learn to showcase your work in a portfolio.
- “Beauty” Cinematic Render vs. Real-Time Rendering Used in Video Games
- Beauty Renders in Advertising & Marketing
- Presenting Work in a Portfolio
- Demo: Using Marmoset Toolbag to create portfolio renders
Final chapter! Learn to build a strong professional portfolio and navigate the job market in the 3D character art industry. Discover effective networking, self-promotion strategies, and tips for acing job interview
- Final Character Render and Peer feedback
- Building a Solid Portfolio
- Networking and Navigating the Job Market
What our students say
"I didn't know 3-D modeling was such an intricate and involved process. It's fascinating to me to see the process of how to build a model and then change it to add more details and/or to make it less detailed, depending on the context and goals. Priscilla does a good job of going over this process."

"I really enjoy the format of the course. Lectures with real life examples and an ongoing case study. Also built in 20 minutes at the end of each class for questions is helpful."
"Overall I'm impressed with the level of detail and explanation around particular topics and subjects. There's a real depth to each module which for learning allows the information to stay in your brain."

"The group activities, they allow us to interact and exchange ideas, plus the way it is structured is challenging and mind twisting as we collaborate in different parts of the ideation."

"I enjoyed the structure of the class. I like how we learned about a topic and practiced it in the workshops. It’s helped me to apply what I learned!"
